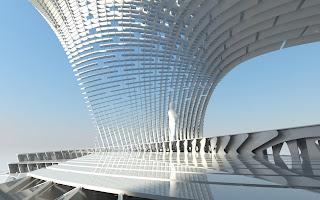
Tuesday, 12 February 2008

CD or AD?

Here's a few sample sheets from our set of construction drawings. Unlike the typical 2D construction document set you would find on a conventional building site, our drawings relate more to an IKEA flat-pack assembly diagram, with 2D views identifying an array of individual pre-fabricated components, and a series of procedural 3D views detailing how to orient and assemble them.

There are three main categories for components, all of which are pre-fabricated and delivered to site:

1. Steel
2. Fibre-C
3. EPDM Rubber Gaskets (joints)

All drawings have been produced exclusively in Rhino 4's drawing layout functions, with some help from the Technical Drawing Plug-in.

Additionally, the 1:10 physical model has been taken down to the site, and is being used as a live "construction reference" during the assembly process.


Pavilion Construction - Day 6

photo from aalog.net


Pavilion Construction - Days 1-5

As stated earlier, the pavilion is now on site! Yusuke has been coordinating the efforts on-site with the help of a team of AA DRL students. There has been a lot of action, as you will see from the photos below...including a surprise celebrity visit to the site...

Progress so far:
  • site fencing erected
  • fibre-c panels delivered and unloaded
  • sand blinding layed to provide flat surface
  • fibre-c ground mat layed
  • fibre-c ground cross profiles being assembled and spaced (in progress)
  • completed 1:10 scale model delivered to site as construction reference
Here's a few photos from the first half week of progress.


Monday, 11 February 2008

recent progress

In advance of the work on site, we've built a 1:10 scale model to do a final check on the fit of all 850 peices. The model uses 3mm thick mdf, which is about twice the thickness of the real elements so the real structure will look even more delicate than the model.....but it will still come to around 30 tons of concrete and 7 tons of steel.

Many thanks to Alan Jinsoo Kim and Aditya Chandra for their assistance with the assembly of the model.


Sunday, 10 February 2008

rieder production photos...

here's some images sent over from Christine Schmidt at Rieder, documenting the production and delivery process for our first shipment (1 of 3) of water jet Fibre-C panels which are now on site and being assembled. as always...more to come.

take a look...


Saturday, 9 February 2008

we're back...

it's been a while since we've posted, but definitely not for a lack work. the pavilion has undergone some major changes...and is finally on site, along with a number of design/production tasks being taken on in parrallel (some of the tasks indicate the design changes). we're now getting quite a bit of help from some of the current AA DRL phase one and phase two students, without whom this would not be possible. time is running out and we have pushed the opening of the pavilion back to 13 March 2008 to coincide with the release of the DRL10 book.

Here is a list of the current on-going processes (in no particular order):

1. site work
  • leveling of site with sand blinding (done)
  • laying ground mat (done)
  • laying ground cross-profiles (in progress)

2. 1:20 laser-cut prototype model
  • laser-cutting of profiles (done)
  • assembly of components (in progress)

3. temporary works
  • site fencing (done)
  • scaffolding (being ordered)
  • design of jigs supports (in progress)
  • erection of jigs

4. fabrication of fibre-c elements
  • cutting of profiles (done)
  • delivery of profiles (group 1 of 3 delivered)

5. fabrication of rubber gaskets
  • extrusion of gaskets (group 1 of 4 done)
  • punching of holes (group 1 of 4 done)
  • delivery (group 1 of 4 done)

6. fabrication of steel structure
  • cutting of steel profiles (in process)
  • off-site assembly of steel profiles
  • on-site erection of steel structure

7. construction documents
  • cutting sheets (done)
  • assembly diagrams (done)
  • gasket details (done)
  • revisions (in progress)

8. coordination
  • IN PROGRESS

as you can see, we still have a lot of work to do.

in the meantime here are the latest images of the version being built.

LOTS more to follow...


Wednesday, 5 December 2007

how to build a pavillion in 9 easy steps...

Here is the lastest plan of attack for the on-site assembly of the pavilion, based in large part by what we learned from our failures with the plywood mock-up, and on the phased production schedule of the Fibre-C profiles which we have agreed with Rieder.

1. Cross Members of Floor deck are layed in place

2. Primary Deck, Bench, and Wall profiles inserted into deck.

3. Lower wall Cross Profiles inserted.

4. Plywood framed jig support erected

5. Primary Global profiles are lifted into place via crane and positioned on jig support.

6. Top Cross Profiles are placed, locking entire roof structure together, and splicing the roof to the walls.

7. Horizontal Bench Profiles are inserted

8. Bench Cross profiles are placed forming the horizontal surfaces of the bench and counter areas.

9. COMPLETION!!!


Sure looks easy...doesn't it? We've still got a lot to figure out, but the wheels are in motion...as always, more to come...